

I've written before about my Mother's love for creme brulee. She is crazy about this delicious dessert. So the last few dinner's we had together, before Wee Bear and I left for Scottsdale, I made her creme brulee. She was in heaven with delight, in fact one night she devoured TWO!!
Of course who wouldn't likes this? We all rejoice at the fun in cracking the sugar on top and the caramel is the quintessential trademark of smooth, creamy, vanilla custard, foiled by the ever-so-slightly bitter burnt sugar.
Wee Bear and I have ordered crème brûlée at restaurants where the custard was rubbery or watery and almost no sugar! Or with a crust so thick I could barely crack through with the provided cutlery. The worst crème brûlée I’ve ever known, was served in Peru, on a trip a couple years ago, I recall wet, hard scrambled eggs. Lacking burnt sugar altogether, it instead held the surprise of cooked quinoa.
Crème brûlée combines sugar, egg yolks and heavy cream to create thick, silky custard, flavored most often with vanilla. With so few ingredients, it is essential to ensure they are of high quality. Using a real vanilla bean will make all the difference! The custard must have just enough body to hold shape. It should taste clean and fresh, if at all possible make the same day or one day ahead. The caramelized, glassy sugar should measure about a millimeter thick so it shatters with a sharp rap..
This recipe is a bit different, I made a caramel, added it to the egg/cream mixture and sea salt. This is Yummalicious!!
SALTED CARAMEL CREME BRULEE
Serves 6
2 c. Heavy cream
1 large vanilla pod
3/4 c. sugar
5 large egg yolks
1-2 tsp. sea salt
extra sugar for top
Pre-heat oven to 250 F
Pour the cream into a saucepan. Split the vanilla pod lengthwise and scrape the seeds into the cream. Put the pod in too.
Bring the cream to a boil, turn off the heat and put the lid on. Allow this to infuse for 10 minutes.
While vanilla pod and cream are steeping, put the sugar in a medium saucepan. Turn the heat on high and stand by, watch the sugar closely. Swirl pan to incorporate the melted and unmelted areas-but do not stir.

Once the caramel has reached a lovely deep amber color and all the sugar is melted, turn off the heat and pour in the warm cream. Whisk continuously to ensure the caramel and cream are combined....careful as the mixture will bubble up.

Crack the eggs into a large heatproof bowl and whisk well.
Pour the caramel mixture over the eggs in a slow and steady stream, while continuously whisking the eggs vigorously.

Whisk in the sea salt, taste.
Strain the mixture into a large measuring cup or heatproof pitcher.
Place 6 ramekins/bowls/jars in a roasting tray. Fill each one about 3/4 full of custard mixture.

Pour hot water into the roasting tray around the ramekins until it comes halfway up the sides.
Place the dish in over and bake for 40 minutes to an hour, until they are just set but, still slightly wobbly in the center.
Take the ramekins out of the water bath and allow them to cool to room temperature.
Just before serving, sprinkle a thin layer of sugar evenly over the top of each custard and caramelize with a torch or broil until brown.

2 c. Heavy cream
1 large vanilla pod
3/4 c. sugar
5 large egg yolks
1-2 tsp. sea salt
extra sugar for top
 |
| Your choice in vessel is totally up to you!! Anything from the traditionall brulee ramekin to an over-sized version (Mom's favorite) to a little wide mouth Mason jar for a fun change. |
Pre-heat oven to 250 F
Pour the cream into a saucepan. Split the vanilla pod lengthwise and scrape the seeds into the cream. Put the pod in too.
Bring the cream to a boil, turn off the heat and put the lid on. Allow this to infuse for 10 minutes.
While vanilla pod and cream are steeping, put the sugar in a medium saucepan. Turn the heat on high and stand by, watch the sugar closely. Swirl pan to incorporate the melted and unmelted areas-but do not stir.
Once the caramel has reached a lovely deep amber color and all the sugar is melted, turn off the heat and pour in the warm cream. Whisk continuously to ensure the caramel and cream are combined....careful as the mixture will bubble up.
Crack the eggs into a large heatproof bowl and whisk well.
Pour the caramel mixture over the eggs in a slow and steady stream, while continuously whisking the eggs vigorously.
Whisk in the sea salt, taste.
Strain the mixture into a large measuring cup or heatproof pitcher.
Place 6 ramekins/bowls/jars in a roasting tray. Fill each one about 3/4 full of custard mixture.
Pour hot water into the roasting tray around the ramekins until it comes halfway up the sides.
Place the dish in over and bake for 40 minutes to an hour, until they are just set but, still slightly wobbly in the center.
Take the ramekins out of the water bath and allow them to cool to room temperature.
Just before serving, sprinkle a thin layer of sugar evenly over the top of each custard and caramelize with a torch or broil until brown.
Allow to cool for a few minutes before serving.
 |
| I made my brulees in two different vessels, I always make extra, for Mom to take home. It is so cute, she always returns the vessels, hoping I will fill them once again for her!! So sweet! |
How to keep your pumpkin looking fresh
Most people want to enjoy their pumpkins and
jack-o’-lanterns as long as possible, yet prefer to avoid the decaying
pumpkin on the doorstep scenario. So how long can you keep a pumpkin
before it rots?
Uncut Halloween pumpkins kept in a cool place, but protected from frost will keep for an average of two months. Depending on the weather (cool and overcast is favorable, hot and sunny is unfavorable), a carved pumpkin will last from one day to one week. You can extend this time up to two weeks by covering every cut surface with petroleum jelly.
Uncut Halloween pumpkins kept in a cool place, but protected from frost will keep for an average of two months. Depending on the weather (cool and overcast is favorable, hot and sunny is unfavorable), a carved pumpkin will last from one day to one week. You can extend this time up to two weeks by covering every cut surface with petroleum jelly.
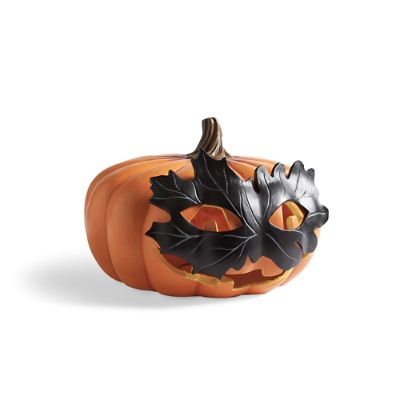
Designer Pumpkins
Lit
jack-o’-lanterns decay more quickly because once the lid is on, the
pumpkin “cooks” from the inside out. The solution is to carve a chimney
hole in the lid so that heat and smoke can escape, allowing your
masterpiece to last much longer. Simply light the candle and see where
black soot marks the lid; then, cut a hole in that spot to let out the
heat.
If you want a
longer-lasting, hassle-free display, consider purchasing artificial
pumpkins. Long gone are the cheap plastic imitations of yore. Many of
today’s designer pumpkins are strikingly realistic and can even be carved. For the greatest
convenience and enduring spook factor, look for faux jack-o’-lanterns
that are pre-lit or light yours with a battery-operated pumpkin candle.

Pumpkin varieties
Pumpkins
are a member of the squash family and, like most fruits and vegetables,
come in a variety of shapes, colors and sizes. To create an
eye-catching visual display, scour your farmer’s market or local garden
center for orange, white, red, and bluish-green varieties. Some are
smooth, but you also are likely to find gnarled specimens that are
downright ghastly.
As an alternative to fresh, faux pumpkins are a mess-free way to decorate season after season. You’ll find variety here, too, with both solid, patterned and carved options in assorted sizes and colors. Some carved pumpkins come pre-lit with mini lights for added convenience. Newer animated jack-o’-lanterns are a fun and frightening twist on this traditional Halloween decoration.
Giant or miniature, oblong or round, smooth or nubby, real or faux, fill your porch or patio display with an extensive variety of pumpkins that will allow you to create the most festive or frightening look you desire.

No comments:
Post a Comment
Please leave a suggestion or comment for me! I would love to respond to it!